
Views: 0 Author: Site Editor Publish Time: 2026-08-21 Origin: Site


Purchasing a replacement chainsaw chain based solely on the advertised bar length often leads to immediate frustration on the job site. You bring home an 18-inch chain, attempt to mount it, and discover it either sags dangerously or refuses to fit over the drive sprocket. Guessing specifications creates severe safety hazards. Incorrect chains cause derailment, aggressive kickback, and catastrophic equipment failure. Understanding the chainsaw chain dl meaning eliminates this guesswork entirely. This guide provides foolproof methods for finding or counting drive links. You will learn a technical framework for evaluating and purchasing the exact replacement chain required for your equipment, even if your guide bar is heavily worn. We will cover how to read bar stamps, measure pitch and gauge, and manually count links so you never buy the wrong chain again.
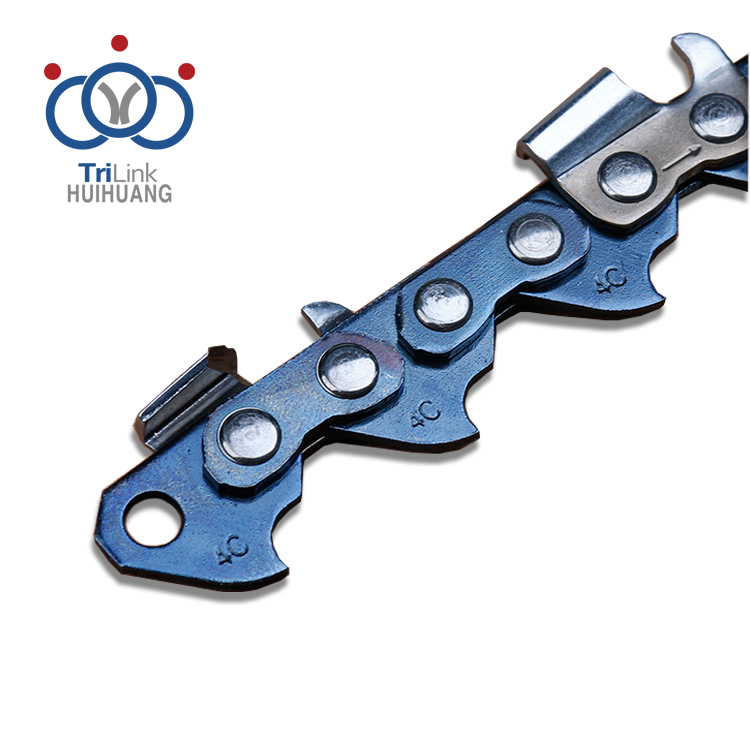
DL Stands for Drive Links: The "DL" metric refers to the exact number of drive links (the bottom teeth that sit in the bar groove), which dictates the true physical length of the chain loop.
Bar Length is Insufficient: Two 18-inch chainsaws from different manufacturers can require a completely different number of drive links. DL is the only accurate measurement for loop length.
The "Big Three" Rule: A replacement chain must perfectly match three specifications to function safely: Pitch, Gauge, and Drive Link (DL) count.
Verification Hierarchy: Always check the stamped numbers on the guide bar first; resort to manual counting and manual measurement only if the stamp is worn off or illegible.
Table of Contents
The drive link is the bottom section of a chainsaw chain. It looks like a small, blunt tooth pointing downward. These links sit directly inside the narrow groove running along the edge of your guide bar. They do not cut wood. Instead, they serve as the mechanical foundation of the entire chain loop. The total count of these specific links determines the exact physical circumference of the chain. When you look at a chain off the saw, the drive links are the components that form the inner circle of the loop. They feature a specific thickness and profile designed to match the guide bar rails perfectly.
A standard saw chain consists of three primary components held together by steel rivets. Cutters are the top teeth featuring sharpened edges that slice through timber. Tie straps are flat metal plates connecting the various parts together on the outside of the loop. Drive links are the bottom protrusions located in the center of the assembly. Visually distinguishing the drive links from the top cutting teeth is a mandatory skill for any operator. Cutting teeth alternate left and right along the top of the chain. Drive links run in a single, continuous line along the bottom, acting as the central spine of the cutting apparatus.
Drive links perform three specific jobs during operation. First, they engage directly with the drive sprocket attached to the chainsaw motor. The sprocket grabs the tang of these links to propel the chain around the guide bar at high speeds. Second, they act as miniature plows. As they travel through the bar rails, they constantly sweep sawdust, dirt, and debris out of the groove to prevent jamming. Third, they distribute bar oil. The bottom of each drive link catches oil from the saw's reservoir port and carries it around the entire bar perimeter to reduce friction and heat buildup.
Measuring a chainsaw bar in inches is a fundamentally flawed approach for buying replacements. An "18-inch bar" only describes the exposed cutting length from the front of the saw body to the tip. It completely ignores the hidden portion of the bar mounted behind the clutch cover. Different manufacturers use varying tail mount profiles. For example, a Stihl mid-size mount differs entirely from a Husqvarna small mount. Drive sprockets also vary in diameter depending on the pitch. These hidden differences alter the required chain loop size. Two saws with 18-inch bars frequently require entirely different drive link counts. Buying a chain based on the inch measurement alone guarantees a high failure rate at the parts counter.
Installing a chain with the wrong drive link count introduces severe risks to the operator. If the chain has too few links, it simply will not fit over the sprocket and bar tip. Installation becomes physically impossible, forcing you to return to the store. If the chain has too many links, you cannot tension it properly. The tensioner pin will max out its travel distance, and the chain will still hang loosely from the bottom of the bar. Operating a loose chain results in a high risk of derailment. A thrown chain can whip back toward the operator at thousands of feet per minute, causing severe lacerations or blunt force trauma.
A successful chain replacement requires precise tolerances. At maximum tension adjustment, the chain must exhibit zero slack along the bottom of the guide bar. You should be able to pull the chain slightly away from the bar by hand, but the drive links must remain seated in the groove. When you release the chain, it should snap back into place against the rails. The chain must rotate smoothly by hand without binding or catching. It must also engage the drive sprocket perfectly without riding up on the sprocket teeth or slipping under heavy load.

The easiest way to find your required drive link count is by reading the guide bar. Manufacturers stamp the exact specifications directly onto the metal. Look at the heel or tail end of the bar, near the mounting pad where it attaches to the saw. You will typically find a cluster of numbers. Look for standard formatting like "72 DL" or "DL: 60". Sometimes, you will see a small icon of a chain link positioned next to a two-digit or three-digit number. If the bar is covered in baked-on sap or oil, spray the heel with brake cleaner and wipe it with a wire brush to reveal the stamped text.
If the bar stamp is illegible due to heavy friction wear, check the packaging of your previous chain. Both OEM brands like Stihl and Husqvarna, and aftermarket brands like Oregon and Carlton, print specifications clearly on the box. Locate the specifications panel on the back or side of the cardboard sleeve. You will see the pitch, gauge, and a specific number designated as drive links. Keep an old box in your workshop or truck tool box to serve as a permanent reference for future purchases.
Many major manufacturers stamp proprietary identification numbers directly onto the drive links. Remove the chain and wipe down the drive links with a rag. Look for small numbers like "72", "73", or "33" stamped into the metal. These numbers do not represent the total count of the loop. Instead, they are manufacturer-specific codes. You can cross-reference these codes on the manufacturer's website to reveal the exact pitch and gauge of the chain. However, you still need the total loop count to buy the right length. These stamps only help you identify the profile, not the circumference.
Your chainsaw operator’s manual contains a dedicated cutting equipment specifications chart. Locate this section in the index. The chart lists the approved guide bars and their corresponding chain requirements. Note that some manuals list multiple drive link counts. This happens when a saw supports various optional bar lengths. Ensure you match the listed DL count to the specific physical bar currently installed on your powerhead. If you bought the saw used, verify that the previous owner did not install an aftermarket bar with a different tail mount profile.
Always remove the chain from the saw before attempting a manual count. Counting a chain while it remains mounted is difficult and often leads to errors because you cannot easily track your starting point. Wear heavy leather work gloves to protect your hands from sharp cutters. Clean off heavy sap, bar oil, and packed sawdust using a rag and solvent. Lay the chain completely flat on a well-lit workbench. Good visibility is essential for an accurate count. If you are in the field, lay the chain on the tailgate of your truck.
This method prevents you from losing your place or double-counting links. Follow these exact steps for the most reliable result.
Select a single drive link and mark it clearly with a high-visibility Sharpie or a small piece of brightly colored tape. This establishes your starting point.
Begin counting the drive links moving in one direction away from your mark. Count only the bottom teeth. Ignore the top cutting teeth entirely.
Continue counting around the loop. Stop counting just before you reach the marked link again. The final number is your exact DL count.
Experienced operators often use this method for speed when working in the woods. It requires no tools or markers.
Hold the chain loop up by pinching one drive link at the top and one at the bottom.
Pull the chain taut so it folds in half. You now have two parallel rows of drive links.
Count the links down one side and multiply by two.
Add the single link you pinched at the top and the single link at the bottom. This method requires practice but saves significant time once mastered.
If you have ample bench space, stretch the chain out in a long, straight line. Ensure the drive links are facing upward. Group the links visually as you move down the line. You can count rapidly by twos or fives using the tip of a screwdriver to point at each group. This method reduces eye strain and helps maintain focus during the count. It is highly effective for long chains used on milling setups, which often exceed 100 drive links.
The most frequent mistake is counting the top cutting teeth instead of the bottom drive links. Cutting teeth are spaced further apart. A chain will always have fewer cutters than drive links. Using the cutter count will result in buying a chain that is far too short. Another common error is counting the flat tie straps on the side of the chain. Always focus exclusively on the downward-pointing teeth that sit inside the bar groove. Take your time and count twice to verify the number.

Specification | Definition | Measurement Method | Impact of Mismatch |
|---|---|---|---|
Pitch | Distance between drive links. | Measure 3 consecutive rivets, divide by 2. | Destroys drive sprocket, chain won't turn. |
Gauge | Thickness of the drive link. | Measure link thickness with digital calipers. | Chain won't fit groove or cuts sloppily. |
Drive Links (DL) | Total count of bottom links. | Manual counting or reading bar stamp. | Chain too loose or too tight to install. |
Cutter Type | Profile of the cutting tooth. | Visual inspection (Chisel vs. Semi-Chisel). | Affects cutting speed and edge retention. |
Pitch determines the physical size and spacing of the chain components. Common pitch sizes include .325", 3/8", and .404". To measure pitch, measure the exact distance between the centers of any three consecutive rivets, then divide that number by two. The pitch of the chain must perfectly match the pitch of the drive sprocket and the bar tip sprocket. A chain with the correct DL but the wrong pitch will instantly bind. Forcing a mismatched pitch will destroy the drive sprocket and ruin the chain within seconds of pulling the trigger.
Gauge refers to the exact thickness of the drive link where it enters the guide bar groove. Common gauge sizes are .043", .050", .058", and .063". A gauge that is too thick simply will not fit into the bar. You will not be able to pull the chain around the rails by hand. A gauge that is too thin will fit, but it will flop side to side during operation. This sloppy fit causes crooked cuts, accelerates bar rail wear, and increases the risk of the chain jumping out of the groove during a heavy plunge cut.
When a guide bar stamp is completely worn off by friction, you must measure manually. Use digital calipers to measure the thickness of a clean drive link to determine the gauge. Ensure you measure the bottom portion of the link that actually rides in the groove, not the upper section near the rivets. To find the pitch, measure across three rivets as described above. Alternatively, inspect the drive sprocket on the chainsaw motor. Manufacturers often stamp the pitch directly onto the rim of the sprocket. You can also take the old chain to a local dealer to use their sizing gauges.
Pitch, Gauge, and DL form a non-negotiable triangle of specifications. All three must align perfectly with your saw's current guide bar and drive sprocket. You cannot compromise on one to satisfy the others. A 72 DL chain with a .050" gauge will not work if your bar requires a .058" gauge. Verify all three numbers before making a purchase. Writing these three numbers in permanent marker on the side of your chainsaw case saves time and prevents ordering errors.
Many users assume they must buy a Stihl chain for a Stihl saw, or a Husqvarna chain for a Husqvarna saw. This is incorrect. Chainsaw chains are universally cross-compatible across brands. As long as the Pitch, Gauge, and DL perfectly match your guide bar requirements, aftermarket chains function safely and effectively. Brands like Oregon produce high-quality replacement chains that fit nearly every saw on the market. You are matching the chain to the guide bar dimensions, not the brand name printed on the plastic engine cover.
You will encounter various cutter styles when shopping for chains. Full-chisel chains offer aggressive cutting for clean timber. Semi-chisel chains handle dirty wood and stay sharp longer. Skip-tooth chains have fewer cutting teeth to clear debris on long bars. Choosing between these styles does not change your required drive link count. A 20-inch bar requiring 72 drive links needs exactly 72 drive links, regardless of whether you choose full-chisel or skip-tooth. The bottom half of the chain remains identical; only the top half changes.
Premium chains generally cost more but offer distinct advantages. They often feature better edge retention, advanced chrome plating, and superior stretch resistance. Standard chains cost less but require more frequent sharpening and tensioning. However, the fundamental DL requirement remains identical across all price tiers. Do not attempt to buy a shorter or longer chain simply because it is on sale. Stick to your exact specifications and choose the quality tier that matches your budget and cutting volume.
If you verified the DL count but the chain still does not fit, diagnose the surrounding hardware. First, confirm you did not accidentally buy the wrong pitch or gauge. Next, inspect the drive sprocket. A severely worn sprocket develops deep grooves that prevent new drive links from seating properly. Finally, check the bar tip sprocket. If the tip is pinched, damaged, or packed with hardened sap, the drive links cannot pass through the nose of the bar. Clean the bar groove thoroughly with a specialized cleaning tool before assuming the chain is the wrong size.
Operators often compare an old chain to a new chain and notice the old one is physically longer, despite having the same DL count. This phenomenon is known as chain stretch. The metal links do not actually stretch. Instead, the rivets and tie strap holes wear down from friction. This microscopic wear at every connection point compounds over the length of the loop. An old, stretched chain will always appear longer than a brand-new chain with identical specifications. Trust your manual count, not a side-by-side visual comparison.
Drive sprockets wear out alongside your chains. Installing a brand-new chain over a deeply grooved, worn-out drive sprocket damages the new drive links immediately. The worn sprocket forces the new chain out of pitch, causing rapid wear on the tie straps and rivets. To mitigate this, replace the drive sprocket after every two to three chain replacements. This maintenance schedule ensures proper tensioning, smooth operation, and maximum lifespan for your cutting equipment. Inspect the rim sprocket for wear indicators every time you remove the clutch cover.
Confirming your chainsaw chain specifications ensures safe, efficient, and reliable cutting performance. Guessing leads to wasted money and dangerous operating conditions. Follow these actionable steps to secure the right replacement:
Wipe down the heel of your guide bar and locate the stamped specifications for Pitch, Gauge, and DL.
If the stamp is illegible, remove the chain, mark a starting point, and manually count the bottom drive links.
Measure the thickness of a drive link with digital calipers to confirm your exact gauge.
Inspect your drive sprocket for deep wear grooves and replace it if you are installing your third consecutive chain.
Write your Pitch, Gauge, and DL on your chainsaw case with a permanent marker for quick reference.
For forestry, landscaping, professional cutting, and other demanding applications, selecting a properly matched saw chain is essential for cutting efficiency, equipment reliability, and safe operation. Zhejiang TriLink Huihuang Co. LTD specializes in saw chain solutions, supporting customers with reliable chain products designed to meet a wide range of cutting equipment and application requirements.
A: No. Using a chain with an incorrect drive link count prevents proper tensioning. One extra link causes the chain to sag, increasing derailment risk. One less link makes the chain too tight to install over the bar and sprocket.
A: No. The inch measurement refers to the exposed cutting length of the guide bar. The drive link count is the exact number of bottom teeth on the chain loop. Two 18-inch bars can require completely different drive link counts.
A: No. Skip-tooth chains have fewer top cutting teeth, but the number of bottom drive links remains exactly the same. The drive link count is dictated entirely by the guide bar and sprocket, not the cutter arrangement.
A: Chains experience mechanical wear at the rivets and tie straps over time. This wear compounds, causing the old chain to become physically longer. A new chain has tight, unworn rivets, making it appear shorter despite having the exact same drive link count.
A: You must measure manually. Use digital calipers to measure the thickness of a drive link to find the gauge. Measure the distance between three consecutive rivets and divide by two to find the pitch. Then, manually count the total drive links.
A: The specifications are typically stamped on the heel or tail end of the guide bar. This is the wide section of the bar that sits behind the clutch cover and mounts directly to the chainsaw powerhead.
A: No. The definition of drive links is a universal standard across the entire industry. Whether you use Stihl, Husqvarna, Echo, or Oregon, DL always refers to the exact count of bottom teeth that engage the drive sprocket.