
Views: 0 Author: Site Editor Publish Time: 2026-05-27 Origin: Site


Ever struggled with a chainsaw chain that just won’t fit right? Installing a chainsaw chain properly is crucial for safety and performance. In this post, you’ll learn about chain components, common mistakes, and step-by-step installation tips. Get ready to handle your chainsaw like a pro!
Before starting, always wear the right personal protective equipment. Gloves made from cut-resistant materials protect your hands from sharp chain links. Eye protection, such as safety goggles, shields your eyes from flying debris or accidental chain snaps. Wear sturdy, closed-toe boots to protect your feet from falling tools or chainsaw parts. Long sleeves and pants help guard your skin from scratches and cuts. Using proper PPE reduces injury risks during chain installation.
Safety begins by making sure the chainsaw cannot start unexpectedly. For gas chainsaws, turn off the engine completely and disconnect the spark plug wire to prevent accidental ignition. For electric chainsaws, unplug the power cord from the outlet. For cordless models, remove the battery before you begin. Always engage the chain brake to lock the chain in place. Place the chainsaw on a flat, stable surface to prevent it from moving while you work. These steps keep you safe from accidental starts and chain movement.
Handle the chainsaw chain carefully to avoid cuts. Always wear gloves when touching the chain, especially if it’s sharp or newly sharpened. Use the correct tools for your chainsaw model—usually a screwdriver, wrench, or socket set—to loosen and tighten bolts. Avoid using makeshift tools that can slip and cause injury. Keep tools organized and within reach to prevent accidental drops. When removing or installing the chain, keep your fingers clear of the sharp cutting teeth and sprocket. Following these precautions ensures a safer chain installation process.
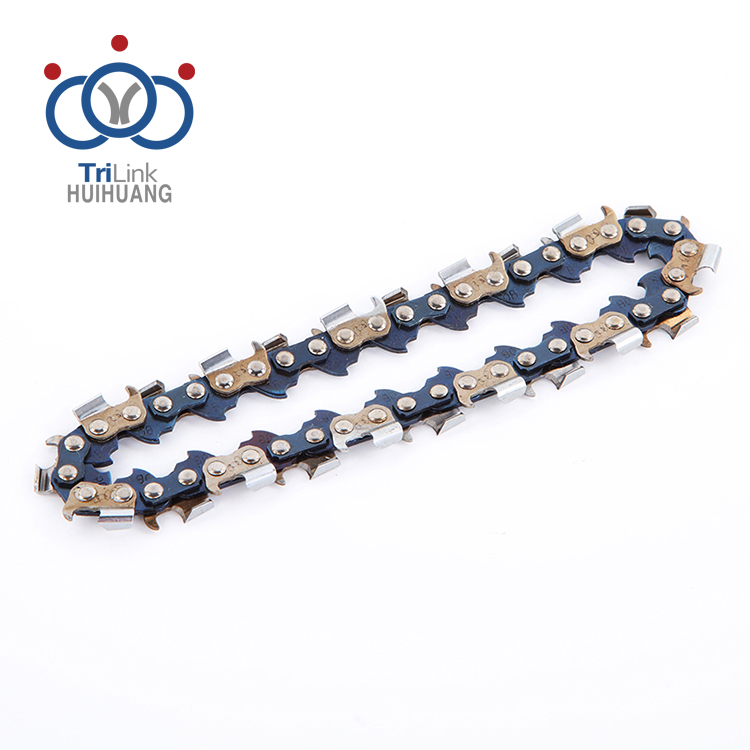
Chainsaw chains come in several types, each designed for specific tasks. Knowing these types helps you pick the right chain for your job:
Low-Kickback (LK) Chains: Safe choice for beginners. They cut smoothly and reduce kickback, making them ideal for general use and tight spaces.
Full Chisel (FC) Chains: Aggressive cutters with sharp teeth. Best for heavy-duty work but require frequent sharpening and careful handling due to higher kickback risk.
Semi-Chisel (SC) Chains: Balanced option. They cut well and last longer than full chisel chains, with less kickback.
Skip Tooth (ST) Chains: Have fewer teeth spaced apart. Perfect for fast cutting of large timber and reduce vibration.
Ripping Chains: Specially designed for cutting along the wood grain. They provide clean, straight cuts with less binding.
The direction the chain faces on the bar is crucial. The sharp cutting teeth must point forward on the top of the bar. This ensures the teeth bite into wood properly when the chain spins.
If installed backwards, the blunt side moves forward, and the saw won’t cut. Imagine trying to cut bread with the dull side of a knife—it just won’t work.
To check direction:
Hold the chain up to light.
Look for sharp teeth pointing away from the bar tip.
Ensure drive links fit snugly in the bar groove.
Correct chain direction guarantees efficient cutting and safer operation.
Chainsaw chains aren’t one-size-fits-all. You must match the chain to your saw’s specifications:
Pitch: Distance between three consecutive rivets divided by two. Common sizes are 1/4", 3/8", and .325". The chain pitch must match the sprocket and bar.
Gauge: Thickness of the drive links that fit into the bar groove. Typical gauges include .043", .050", and .058". Using the wrong gauge can cause poor fit or damage.
Length: Number of drive links determines chain length. It must match the bar length exactly.
Type: Some chains are made for gas, others for electric or cordless saws. Always check manufacturer recommendations.
Using incompatible chains can cause poor cutting, increased wear, or safety hazards. Consult your chainsaw manual or dealer to find the right chain.
Before installing a new chain, inspect the chainsaw bar and sprocket closely. Look for signs of wear like grooves worn too deep or unevenly, cracks, or bent parts on the bar. The sprocket teeth should be sharp and intact; worn or missing teeth can cause poor chain fit or slippage. If you spot damage, replace the bar or sprocket before fitting the new chain to avoid further issues or safety risks. A smooth, undamaged bar and sprocket ensure the chain runs efficiently and safely.
Having the right tools ready makes chain installation easier and safer. Typically, you’ll need:
A flathead screwdriver or specialized chainsaw tool for adjusting chain tension.
A wrench or socket set to loosen and tighten the side cover bolts.
Cut-resistant gloves to protect your hands from sharp chain teeth.
A clean rag to wipe down parts if needed.
Refer to your chainsaw’s manual for any model-specific tools or instructions. Organize tools within easy reach on a stable work surface before starting.
Before installation, check your new chain carefully. Look for:
Broken or bent links.
Missing or damaged cutting teeth.
Rust or corrosion.
Verify the chain matches your chainsaw’s specifications:
Pitch: Distance between rivets; common sizes include 1/4", 3/8", and .325".
Gauge: Thickness of drive links that fit into the bar groove.
Length: Number of drive links must match your bar length exactly.
Also, ensure the cutting teeth point in the correct direction for your chainsaw’s rotation. Installing the wrong size or defective chain can cause poor cutting performance or damage your saw.
Start by making sure your chainsaw is off and cool. For gas models, disconnect the spark plug wire. For electric or cordless, unplug or remove the battery. Engage the chain brake to keep the chain from moving.
Locate the side cover on your chainsaw. This cover protects the bar and chain. Use a wrench or screwdriver to loosen the bolts or nuts holding the cover. Loosen them enough so the cover can wiggle but don’t remove the bolts completely—they keep the cover attached.
Gently slide the side cover off. You’ll see the guide bar and the chain. Push the guide bar forward slightly to release tension on the chain. Carefully lift the old chain off the bar, starting at the top. Handle the chain carefully to avoid cuts. Set the old chain aside safely.
Before wrapping the new chain, inspect the guide bar groove for debris or damage. Clean if needed to ensure smooth chain movement.
Take the new chain and find the sharp cutting teeth. These teeth must face forward on the top of the bar—the direction the chain spins when cutting. Begin wrapping the chain around the bar, starting at the back near the sprocket. Fit the drive links into the groove along the bar’s edge.
Continue wrapping the chain around the bar, making sure it sits evenly in the groove without twists or kinks. Check that the sharp teeth point forward on the top of the bar and downward on the underside. Proper direction is key for cutting performance.
Next, position the guide bar back onto the chainsaw’s mounting studs. Align the drive links so they fit snugly into the teeth of the sprocket. The sprocket drives the chain, so proper fit is essential for smooth operation.
Make sure the chain sits evenly along the bar and sprocket. If the chain feels loose or uneven, reposition it carefully. The chain should move freely but not sag excessively.
Once the chain and bar are aligned, slide the side cover back onto the chainsaw. The cover will have a hole that fits over the chain tension adjuster screw. Align this hole carefully so the adjuster can be accessed for tensioning later.
Insert the bolts or nuts back through the cover holes and thread them loosely. Do not tighten fully yet—you’ll need to adjust the chain tension first.
Use a screwdriver or the tensioning tool to turn the tension adjuster screw clockwise. This tightens the chain. Pull the middle of the chain away from the bar about 1 inch and release it. The chain should snap back firmly against the bar.
If the chain hangs loosely or falls off, it’s too loose. If it won’t move or feels stiff, it’s too tight. Adjust tension until the chain moves freely but stays snug against the bar.
After setting the correct tension, tighten the side cover bolts firmly. Use your wrench or screwdriver but avoid over-tightening, which can strip threads or damage parts.
Once tightened, double-check the chain tension again. The chain should remain snug and move smoothly when pulled by hand.
Your chainsaw chain is now properly installed and ready for use after final safety checks.
Proper chain tension is vital for safe and efficient chainsaw operation. To test tension, first make sure the chainsaw is off and secured. Then, pull the chain away from the bar’s middle section about one inch. It should snap back firmly against the bar without sagging. If it doesn’t snap back or hangs loosely, the chain is too loose. If it feels stiff or doesn’t move at all, it’s too tight. The chain should have slight play but remain snug in the bar groove, allowing smooth movement by hand.
A chain that’s too loose can slip off the bar during use, causing dangerous kickbacks or injuries. Loose chains also reduce cutting efficiency and increase wear on the bar and sprocket. On the other hand, a chain that’s too tight strains the motor and can cause premature wear or even break the chain. Over-tightening also increases friction, leading to overheating and damage to the guide bar. Both extremes compromise safety and tool longevity.
Chainsaw chains naturally stretch during use due to heat and wear. Regular checks before and during cutting tasks help maintain optimal tension. Adjust tension by loosening the side cover bolts slightly, then turning the tension adjuster screw clockwise to tighten or counterclockwise to loosen. After adjustment, pull the chain to test tension again. Once correct, securely tighten the side cover bolts to hold everything in place. Frequent tension checks prevent accidents and extend chain life.
Chainsaw chains can experience several common problems during use. One frequent issue is chain slipping—when the chain comes off the guide bar or sprocket. This usually happens if the chain is too loose or if the bar and sprocket are worn out. Another problem is misalignment, where the chain doesn’t sit properly in the bar groove or on the sprocket teeth. Misalignment causes uneven cutting and can damage the chain or bar. You might also notice rough movement, where the chain feels jerky or stiff while moving. This often results from poor lubrication, dirt buildup, or incorrect tension.
Fixing these issues requires careful inspection and adjustment. First, always power off and secure the chainsaw before working on the chain. To fix slipping or loose chains, loosen the side cover bolts slightly and turn the tension adjuster screw clockwise to tighten the chain. The chain should have slight play but snap back firmly when pulled away from the bar. For misalignment, remove the side cover and bar, then reposition the chain so all drive links fit snugly in the bar groove and teeth align properly on the sprocket. Clean the bar groove and sprocket teeth from debris or sawdust before reinstalling. If the chain moves roughly, check that the chain oil reservoir is full and the oil delivery system works correctly. Lubricate the chain regularly to reduce friction and wear.
Chainsaw chains wear out over time and need sharpening or replacement. You should sharpen the chain when cutting performance drops, you feel increased vibration, or the chain produces rough or torn cuts. Sharpening restores the cutting edges and improves efficiency. Use a proper chainsaw file or sharpener, following the correct angle and depth for your chain type. However, if the chain has broken or missing teeth, bent links, or excessive wear, replacement is necessary. Also, replace the chain if it stretches beyond adjustment limits or if sharpening no longer improves cutting. Regularly inspect your chain before and after use to catch wear early and maintain safe, effective cutting.
Keeping your chainsaw chain well-lubricated is key for smooth operation and long life. Chain oil reduces friction between the chain and the guide bar. Without enough oil, the chain heats up, wears faster, and can even break.
Here’s how to fill the chain oil reservoir:
Place the chainsaw on a flat surface with the oil cap facing up.
Clean the area around the oil cap to prevent dirt from entering.
Unscrew the oil cap carefully.
Pour high-quality bar and chain oil into the tank, but don’t fill it to the brim.
Replace and tighten the cap securely.
Check the oil level regularly, especially during long cutting sessions. Many chainsaws have a small window to view oil level. If your chain looks dry or sparks fly during cutting, stop and refill the oil immediately.
While the basic chain installation steps are similar across chainsaw types, some differences exist:
Gas Chainsaws: Usually have side-mounted tensioners. You’ll need to loosen nuts on the side cover to remove it. Disconnecting the spark plug before working is essential for safety. After installing the chain, tighten the nuts firmly.
Corded Electric Chainsaws: Generally lighter and easier to handle. Unplug the power cord before starting. Side covers often secured by screws, which you’ll remove with a screwdriver. Chain tension is adjusted via a screw or dial.
Cordless Chainsaws: Battery removal is the first safety step. Many models feature quick chain tensioning systems that require fewer tools. Some use wing nuts or knobs for faster chain changes. Always ensure the battery is out before installation.
Understanding these differences helps you install chains safely and efficiently.
To get the most out of your chainsaw chain, follow these tips:
Keep the Chain Sharp: Dull chains cause poor cuts and increase wear. Sharpen regularly using a file or electric sharpener.
Maintain Proper Chain Tension: Too loose or tight wears the chain and bar prematurely.
Use the Right Chain Oil: Avoid substitutes like motor oil. Use bar and chain oil designed for lubrication and stickiness.
Clean the Chain and Bar: Remove sawdust, sap, and debris after each use to prevent buildup.
Avoid Cutting Dirt or Rocks: These quickly dull and damage the chain.
Store the Chainsaw Properly: When not in use, keep it in a dry place, and cover the bar and chain to prevent rust.
Inspect Regularly: Check for damaged or bent links and replace the chain if necessary.
Following these practices reduces downtime and saves money on replacements.
Proper chain installation involves securing the chainsaw, aligning the chain correctly, and adjusting tension precisely. Regular maintenance ensures smooth cutting and extends chain life. Always follow safety guidelines to prevent injuries and equipment damage. Using quality chains and tools enhances performance and reliability. ZHEJIANG TRILINK HUIHUANG CO.TTD offers durable chainsaw chains designed for safety and efficiency, providing excellent value for users seeking dependable equipment and expert support.
A: A chainsaw chain is the cutting component that wraps around the guide bar. The sharp teeth must face forward on the top of the bar to cut efficiently and safely.
A: Ensure the chainsaw is powered off, wear gloves, wrap the chain with teeth facing forward around the bar, align it on the sprocket, fit the side cover, then adjust tension correctly.
A: Chainsaw chains have sharp teeth that can cause cuts. Wearing cut-resistant gloves protects your hands during installation and maintenance.
A: Check chain tension before each use and after several minutes of cutting to maintain safety and performance.
A: Issues include slipping, misalignment, or rough movement. Fix by adjusting tension, cleaning debris, and ensuring proper alignment on the bar and sprocket.

